

Custom Calf Massager Routines That Melt Away Leg Tension
2026-11-21
If you spend long hours on your feet or glued to a desk, your calves are often the first to pay the price—tight, heavy, and stubbornly sore. Instead of relying on generic stretching that barely scratches the surface, imagine a routine that actually kneads away deep tension while you relax. At XINGBU, we’ve put together custom calf massager techniques designed to target the exact spots that make your legs feel like concrete. Ready to feel light on your feet again? Let’s walk through the routines that turn painful knots into pure relief.
Warm Up the Soleus With a Slow, Feather-Light Pass
The soleus rarely asks for much, so give it less than you think it needs. Sit with the knee bent enough to slacken the outer calf, then use the pads of your thumbs or a very soft ball just above the Achilles. The pass should feel closer to a slow breath than a massage stroke — barely enough pressure to dent the skin, moving upward toward the knee in one unbroken line.
If you catch yourself grinding or chasing a “good hurt,” reset. A feather-light pass works because the soleus sits deep and responds to time and temperature more than force. Work for thirty to sixty seconds per leg, pause when the tissue feels warmer, and let the ankle rock gently through its range before standing up.
The point is not to soften the muscle by force, but to wake its sensory endings so it stops guarding. Afterwards, walk a few steps and notice whether the heel drops with less resistance. That subtle change is usually a better sign of readiness than any deep-tissue burn.
Trace the Inner Calf Crease After Long Hours at a Desk
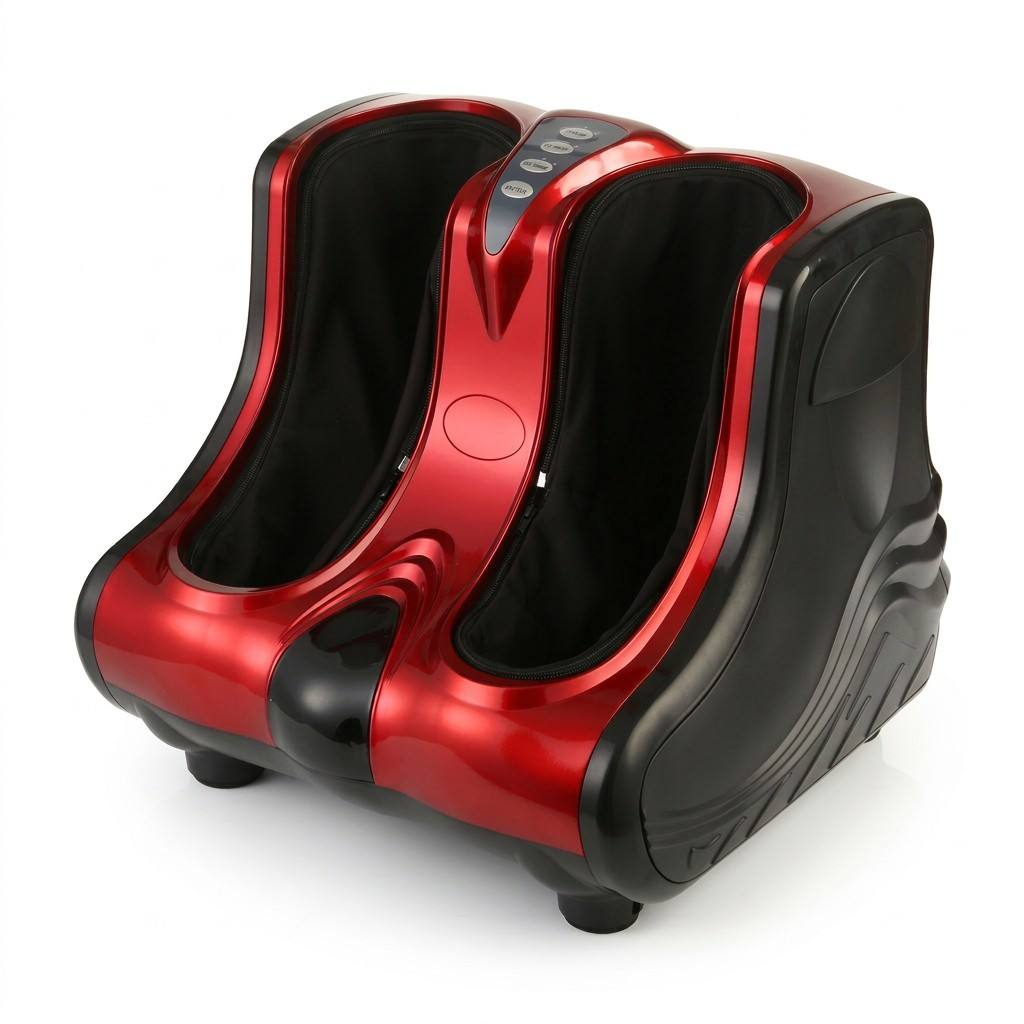
After hours of sitting, the inner calf often holds more tension than it lets on. The crease just behind the shin bone, where the deeper calf muscles sit, can feel ropy or tender when pressed. Rather than rolling the whole lower leg, start by finding that line from just below the inner knee toward the ankle. Use slow, steady pressure with your thumbs or the side of your hand, pausing on any spot that feels dense or slightly stuck.
Work in short strokes along the groove, not across it. Keeping the pressure angled toward the bone, rather than into the meaty part of the calf, reaches tissue that stiffens when the knees stay bent too long. The sensation may feel dull or achy, but it should not turn sharp. Let the foot stay relaxed so the deeper layers don't brace against the pressure.
A few passes on each leg can make standing and walking feel less heavy, especially at the end of a workday. If one side feels more restricted, give it a little extra time. The point is not to press hard, but to ease the area back into length after it has been stuck in one position for too long.
Switch to a Narrow Tip for the Knot Just Below the Knee
When you're working just below the knee, the angle changes quickly, and a wide tip often slips or presses unevenly against the tendon. Switching to a narrow tip gives you a smaller contact point that can sit precisely between the bony landmarks without asking you to over-rotate your wrist. It's a subtle change, but it usually makes the pressure feel more deliberate instead of spread out and vague.
The knot in this area tends to sit deeper than it does higher up the calf, so a narrow tip also helps you reach through the superficial layers without grinding into the shin. Try working in short, slow passes and let the tip sink on its own rather than pushing hard from the shoulder. If the sensation becomes sharp or electric, back off slightly and shift the angle; that usually means you've found the edge of the nerve, not the muscle belly itself.
One practical trick is to keep the narrow tip almost perpendicular for the first few seconds, then tilt it about ten degrees toward the outside of the leg. This follows the natural fiber direction of the tibialis anterior and peroneals, and it often releases the knot much faster than staying in one fixed position.
Flush Post-Run Heaviness With Slow Reverse Strokes
That heavy, dead-legged feeling after a hard run usually comes from blood pooling in your lower limbs. Instead of lying flat or staying still, try walking a few minutes to let your heart rate settle, then lie on your back and prop your legs up against a wall. Slowly stroke from your ankles toward your hips, one leg at a time, using just enough pressure to feel the tissue give under your hands. Keep the pace unhurried and let each stroke last five to eight seconds. This gentle direction helps move stagnant fluid back toward your core, and the slow rhythm keeps your nervous system from staying in overdrive.
Many runners rush their cool-down or reach for aggressive massage tools right away, but post-run heaviness responds better to a calm, deliberate touch. Work in a warm room if you can, and repeat each pass three to four times before switching legs. You might notice the feeling of soreness changes as you continue; that shift is often the fluid moving and the muscle relaxing under the skin. Keep your breaths long and even, especially on the exhale, as this deepens the effect. Over the next ten to fifteen minutes, the leaden sensation tends to fade, leaving a lighter, more open feeling in the legs.
Doing this regularly, even for just ten minutes after tougher sessions, helps your legs recover without adding extra fatigue. The key is not to grind into sore spots but to glide with a steady, patient rhythm. If one area feels thicker or warmer than the rest, spend a little more time there, always moving upward. Your hands will learn the difference between tightness that softens and deeper strain that needs rest. With consistent practice, this simple routine can become as routine as lacing your shoes, and the post-run heaviness won't linger the way it used to.
Wind Down With Heat and a Gentle Rolling Sequence Before Bed
Before bed, heat does more than just relax your muscles — it shifts the nervous system toward rest. A warm shower, a heating pad on the lower back, or even a hot water bottle at your feet can lower the body's core temperature slightly after the initial rise, which signals your brain that sleep is near. Pair this warmth with slow, rolling movements on the floor: spinal rocks, knee circles, gentle hip tilts. The combination softens tension without demanding effort, making it easier to transition from the day's pace into a quieter rhythm.
Keep the sequence intentionally simple. Start lying on your back with knees bent, letting them fall left and right like a slow pendulum. Move to a gentle figure-four stretch, then roll onto your stomach for a soft cobra lift. The key is not to push for deeper range, but to follow what feels heavy and release it bit by bit. Heat should stay comfortable, never intense — a low-level warmth you can forget is there, as your breath slows and your limbs feel heavier.
Finish by resting on your back with your legs up the wall or simply extended on the bed. Let your palms face up and your jaw unclench. This kind of rolling movement, done without the goal of getting anywhere, tells your body it's safe to let go. Over time, the routine becomes a signal in itself: the warmth arrives, the rolling begins, and sleep follows more predictably than before.
End on a Still-Point Hold Over the Tightest Trigger Spot
Many release techniques fall apart because they keep chasing pain around a knot. Once you have located the tightest trigger spot, stop moving. Sink into it just deep enough to feel a clean, specific ache, then let your hand or tool go quiet. This is not passive waiting; the steady pressure becomes a clear signal that gives the tissue a chance to downshift.
A still-point hold works because it interrupts the nervous system's guarding loop. Rapid digging or rolling can feel productive, but it often makes the surrounding muscle brace harder. When the pressure stays constant over that exact spot, the initial sharpness tends to fade into warmth or softening. Let that shift be your endpoint, not the complete disappearance of pain.
Close the session with that hold instead of adding extra strokes. Keep your breath slow and your shoulder relaxed, then release the pressure gradually once the intensity drops by half or more. Ending on this quiet, precise note leaves the area less defensive and gives the body a clear memory of ease rather than a fresh round of irritation.
FAQ
Custom usually means adjusting pressure, heat, and position to match how your legs feel that day. Instead of running the same preset every time, you might start with lighter compression around your ankles, pause on tight spots mid-calf, and use heat only after the muscles have loosened. Small changes like propping your legs at different angles or targeting one leg longer than the other make the session feel personal.
Around 15 to 20 minutes tends to be enough for daily recovery. If the tension is intense, split it into two shorter sessions, like 10 minutes after work and another 10 before bed. Going too long can leave calves feeling bruised or overworked, so pay attention to how your legs respond rather than chasing a set timer.
Yes. Start with a gentle compression-only cycle for five minutes to wake up the tissue, then shift to a deeper kneading or rolling mode focused on the lower calf and soleus. Finish with elevation above your hips and mild heat. Avoid deep pressure directly on the Achilles or any spot that feels sharp during the session.
You can, but posture matters more than people expect. Keep your feet flat or slightly elevated and don't let the massager push your legs into an awkward twist. Brief office sessions work well for circulation and midday heaviness, though they won't replace a proper recovery session when you're lying down with legs supported.
Try low intensity compression, no heat or very low heat, and a slow wave-like rhythm for about 12 minutes. Keep your legs slightly raised on a cushion. The goal is to downshift the nervous system, so avoid aggressive kneading right before sleep. Pair it with slow breathing and the effect usually feels more calming.
For most people, once a day is a solid baseline, and twice a day can work if you're on your feet constantly or training hard. Give the muscles a day with lighter work if you notice tenderness that lingers. The key is consistency rather than intensity, so a shorter daily habit usually beats a long deep session once a week.
Generally, use compression first to encourage blood flow, then add heat once the muscles feel warmer and more pliable. Starting with high heat can make swelling or tightness feel worse for some people. Ending with a brief heat-free compression cycle can also help settle the legs before you stand up.
Conclusion
Leg tightness rarely comes from one single spot, so a routine that shifts pressure, tip shape, and pace tends to work far better than grinding the same line. Starting with the soleus just above the Achilles, a barely-there pass helps wake up the tissue without guarding. From there, tracing the inner calf crease after long desk hours feels surprisingly effective because that strip tends to hold the day's sitting patterns. When a stubborn knot sits just below the knee, switching to a narrow tip lets the massage head settle into the exact point instead of sliding past it, and short, patient passes there can unlock tension that wider heads often miss.
For legs that feel heavy after a run, reversing the stroke direction at a deliberately slow pace helps move out that congested, sluggish feeling without roughing up already tired muscle. As the evening winds down, adding heat before a gentle rolling sequence changes the entire session: warmth loosens the outer layers so deeper pressure no longer has to fight through stiffness. Finally, a still-point hold over the tightest trigger spot lets the tissue release under steady, quiet pressure. The whole sequence takes only a few minutes, but the mix of feather-light warm-ups, targeted narrow work, heated rolling, and that final static hold covers the different ways calves hold stress.
Contact Us
Contact Person: Hannah
Email: [email protected]
Tel/WhatsApp: +86 18266954198
Website: https://www.okmassager.com/