

OEM Complete Cylinder Head Buying Guide and Installation Tips
2026-10-04
When your engine starts knocking or loses compression, a complete cylinder head replacement often becomes the smartest fix—not just a patch. But navigating the OEM market can feel like a maze: What's the right casting? Which gaskets match? How do you avoid installation errors that wipe out a new head? This guide cuts through the noise, covering everything from choosing a true OEM complete cylinder head to step-by-step install tips that even first-timers can follow. We’ll also highlight why experienced mechanics increasingly turn to DDR for cylinder heads that fit right the first time. Let’s get your engine back to full health.
When the Head Gasket Fails Twice, It’s Time to Look at the Casting
A single head gasket failure can often be written off as bad luck—a flawed gasket, an overheating episode, or a torque sequence gone wrong. But when the same engine blows a second gasket within a short span, the real culprit is rarely the gasket itself. Repeated failures point to a problem you cannot see from the outside: the cylinder head or block deck surface is no longer flat, or the casting has shifted enough to compromise the seal. Ignoring this reality means throwing away money on gaskets while the underlying defect keeps tearing them apart.
Look closely at the old gasket and the mating surfaces. If the failure appears in the same location both times, start measuring. A machinist’s straight edge and feeler gauges across the deck will reveal warpage that a quick visual check misses. On many modern engines, especially aluminum heads on iron blocks, heat cycling can cause the casting to creep or sink around the head bolt bosses. This creates a low spot right where combustion pressure is highest. Resurfacing the head is the obvious fix, but if the block deck has moved, the engine may need to come out for a full deck job—or a replacement block.
Sometimes the issue is even deeper: porosity in the casting, a cracked water jacket, or a head bolt hole that pulls threads under load. A pressure test on the cooling system and a careful inspection of the bolt holes after the second failure can save you from a third teardown. The lesson is simple—one bad gasket is a maybe, two bad gaskets is a message. The casting is trying to tell you something, and it is time to listen.
OEM Complete Doesn’t Always Mean Ready to Bolt On: What to Ask the Supplier
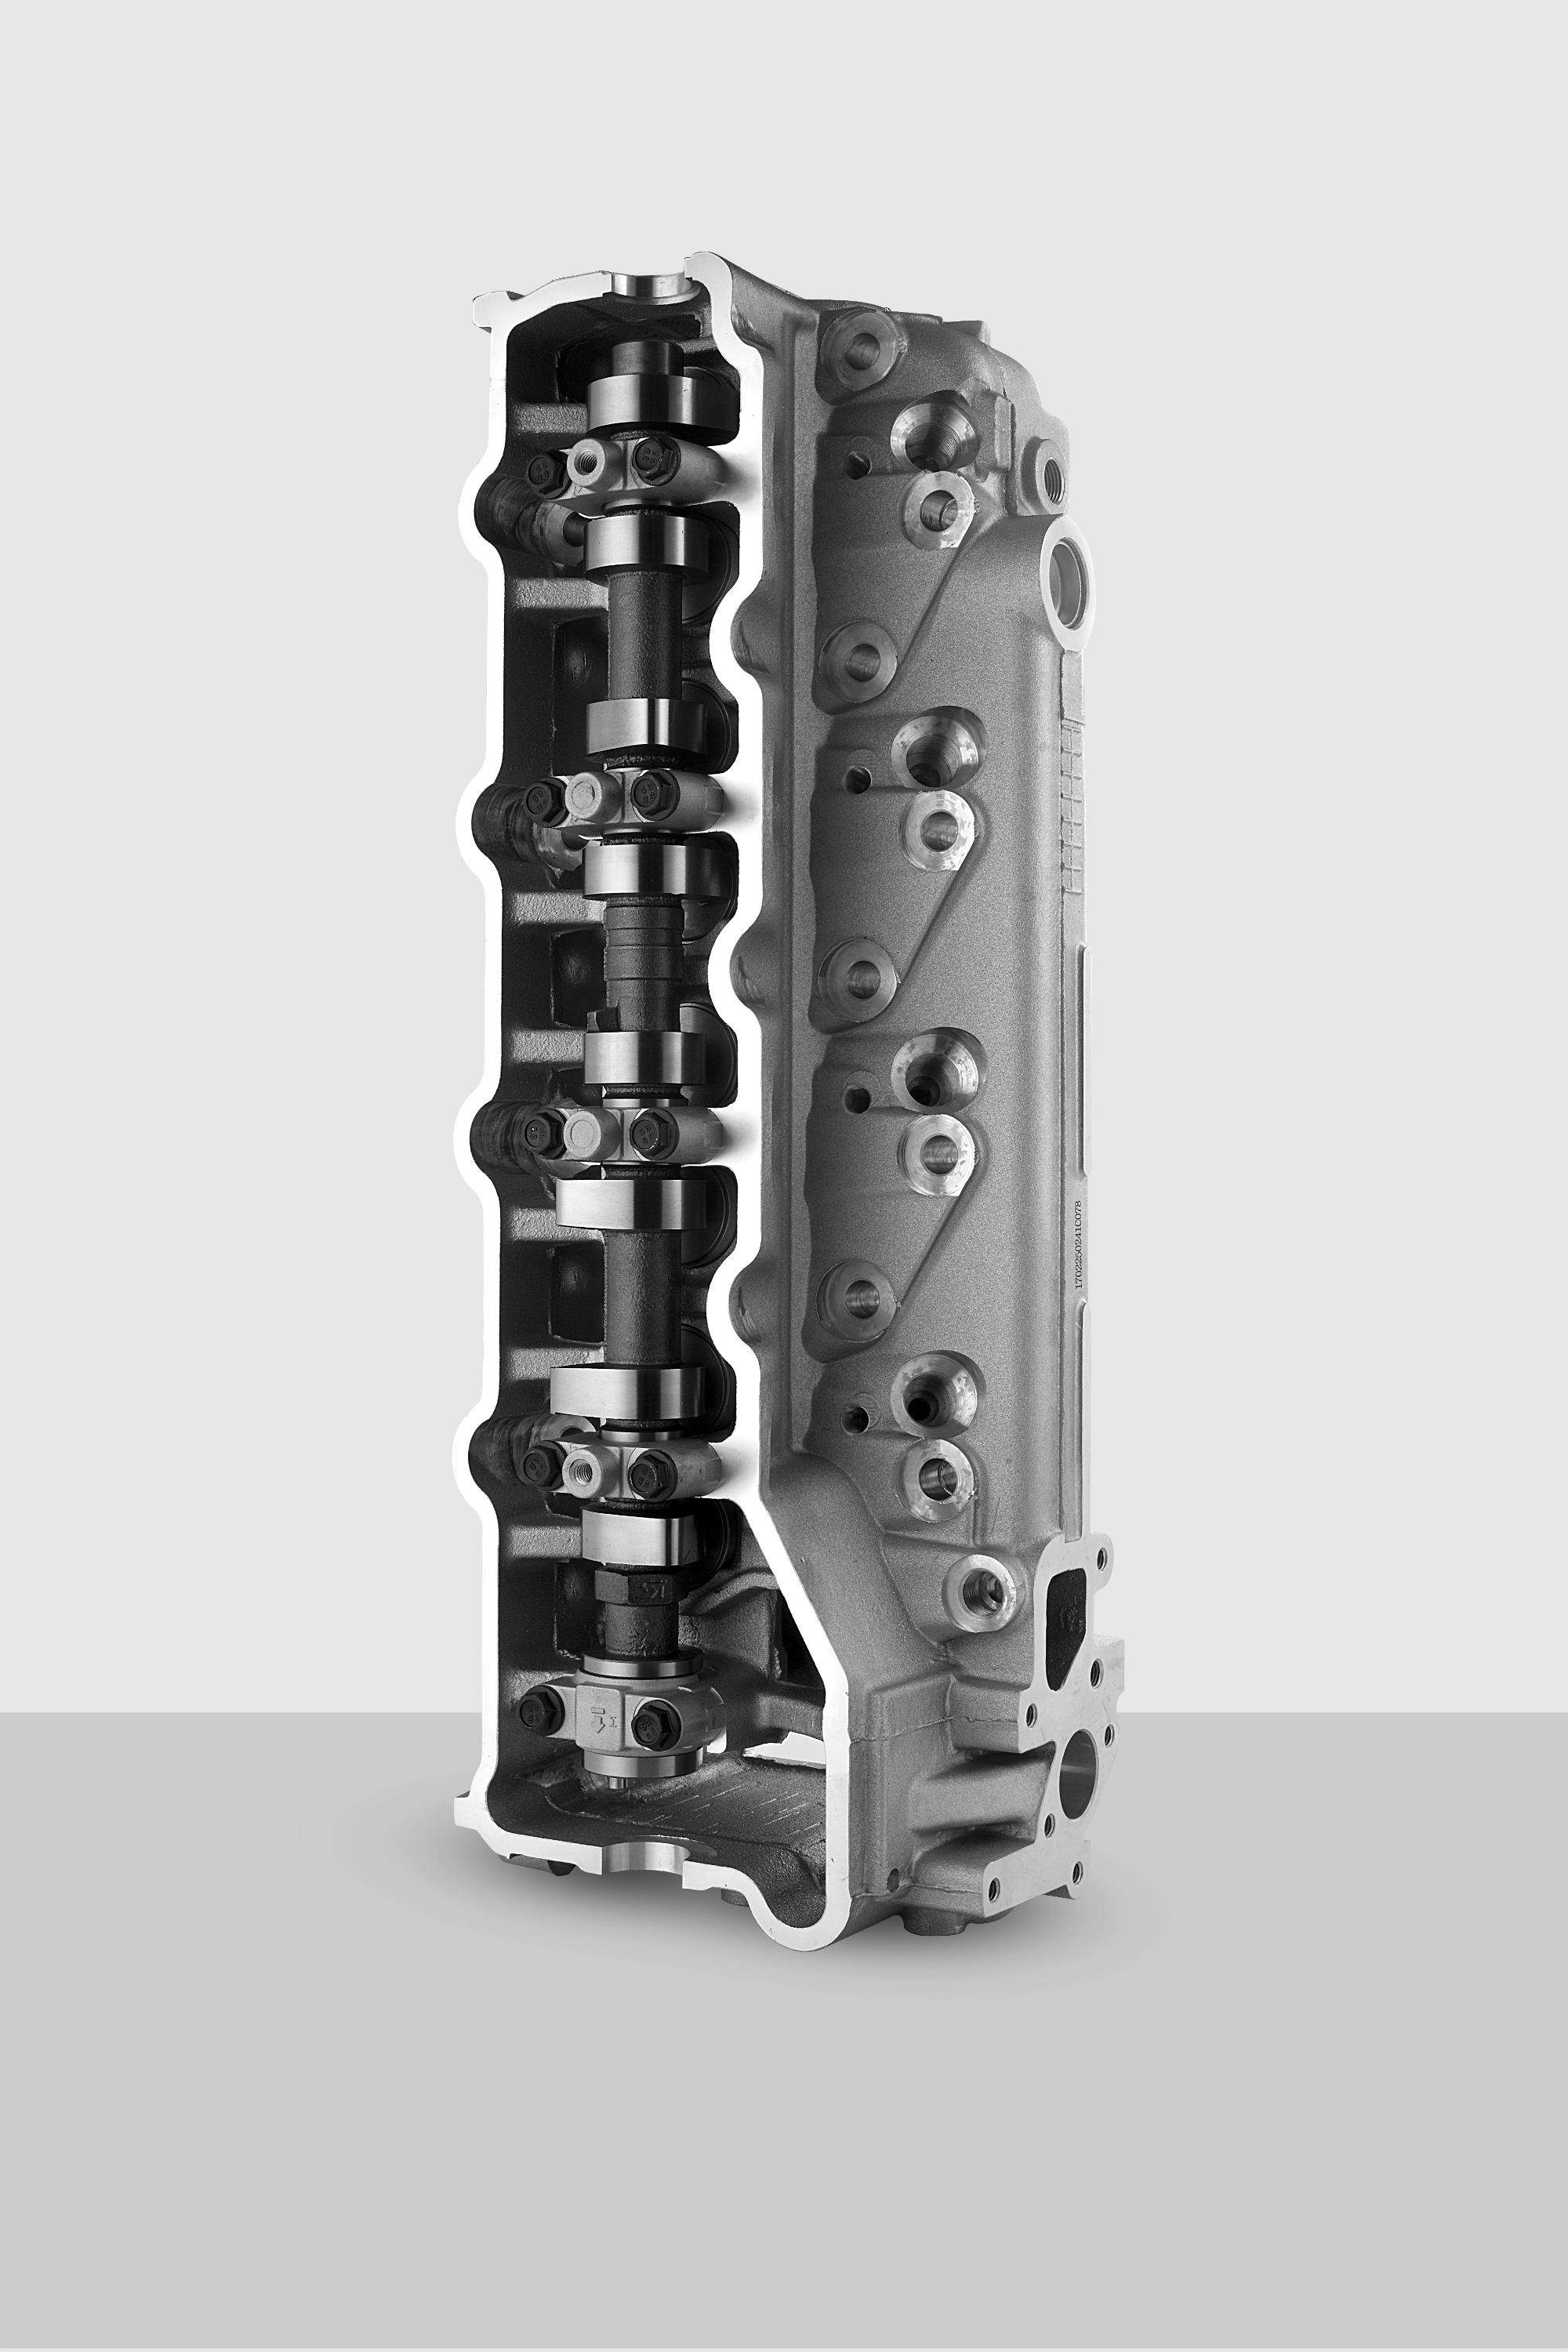
The phrase “OEM complete” gets thrown around a lot, but it rarely tells the whole story. A part might leave the factory with every bracket, bolt, and gasket in the box, yet still need bending, trimming, or a trip to the machine shop before it actually fits your chassis. Too many shops find that out the hard way, with the vehicle already torn down and a deadline looming. That’s why the very first thing to pin down is the supplier’s definition of “complete”—not the brochure version, but the real-world one based on other customers’ installs.
Ask flat out what modifications were needed on the last five jobs they shipped for. Did the driveshaft clear the crossmember? Were all the mounting holes in the right place, or did the techs have to oval them out? A trustworthy supplier will have answers that line up with what you see on forums or hear from local builders. If they dodge, or claim nobody ever has to tweak anything, treat that as a warning sign. Real OEM-style parts often have minor variances, but the good suppliers document them and tell you upfront instead of letting you discover it at 9 p.m. on a Saturday.
Finally, get the whole kit and kaboodle in writing: what exactly is included, what’s expected to be reused from your existing setup, and what labor they assume is already done. If the instructions start with “step one: fabricate a simple bracket,” that’s not a bolt-on. The goal isn’t to avoid every single adjustment—some rigs are just quirky—but to make sure you’re not paying for a “complete” package that secretly needs a welder, a grinder, and a miracle.
Casting Numbers, Date Stamps, and Core Charges: Reading Between the Lines
Foundry markings often hide more than they reveal. A casting number stamped near a bolt flange might point to a specific mold revision, while a date stamp tells you when the pour happened—not when the part was machined or shipped. Many rebuilders take these stamps at face value, but the real story lives in the slight mismatches: a core charge code that doesn’t align with the known production run, or a date that falls on a holiday shutdown. Those gaps are where you find replacement blocks, prototype runs, or warranty swaps that never made it into the catalog.
Core charges add another layer of ambiguity. A high core charge on an otherwise common casting usually signals that the foundry is short on reusable molds, or that the part has a known cracking issue that makes returns scarce. Shops that track these charges seasonally notice they fluctuate not with scrap metal prices, but with the number of failed cores coming back from the field. Reading those numbers alongside date stamps lets you predict which castings are about to go on backorder—and which ones are quietly being superseded.
The trick is to treat each stamp as a sentence in a longer paragraph. A date stamp that repeats across multiple part numbers suggests a shared mold or a batch pour. A core charge that drops suddenly often means a new supplier took over, and the old casting’s tolerances may not carry over. None of this gets printed on the box, but once you learn to read between the lines, the foundry floor starts speaking plainly.
Before You Lift the New Head: The Dry Fit That Catches Most Mistakes
You have the new cylinder head sitting on the bench, fresh gasket already in place, and every torque spec memorized. But before you swing that heavy casting over the fender, take ten minutes for a dry fit. This step is not about checking bolt holes—it is about catching the mistakes that only show up when metal meets metal without any sealant or gasket hiding the gaps. Lay the head on the block with no gasket, no sealer, just the bare surfaces. Wiggle it. Feel for high spots. Look for daylight under the mating face. More than one builder has discovered a warped deck or a leftover dowel pin only after the head was torqued down and coolant was already leaking into the oil.
The dry fit also reveals problems with valve-to-piston clearance long before you turn the key. With the head resting in place and the timing set roughly, rotate the crank by hand through a full cycle. If you feel any resistance or hear a faint tick, stop. That is a valve kissing a piston crown, a cam timing issue, or a head gasket thickness that is too thin. Catching it now costs you nothing but a few minutes. Catching it after the intake manifold is bolted on and the headers are tight means tearing everything back down.
One more thing most people skip: check the alignment of every oil and coolant passage. With the head dry-fitted, shine a flashlight down each hole in the head and make sure it lines up perfectly with the matching hole in the block. Even a slight offset can starve a rocker arm or trap air in a water jacket. If you see a crescent-shaped shadow at the edge of any passage, that is a gasket about to blow or a casting flaw about to ruin your afternoon. Fix it now, before the new head ever gets lifted for real.
Torque Sequence and the Right Sealant Beat Expensive Gaskets Every Time
Most flange leaks aren't caused by cheap gaskets. They happen when bolts are wrenched down in a haphazard circle, warping the mating faces just enough to open a path for fluid. A proper torque sequence—crisscross or star pattern, stepped in two or three passes—pulls the joint down evenly. That even clamp load is what lets a mid-range gasket hold pressure that a premium gasket would lose under uneven bolt tension.
Sealant choice works the same way. A thin, compatible anaerobic or RTV bead fills micro-scratches and casting porosity without squirming out under heat. Too much sealant, or the wrong chemistry, creates a slick film that acts like a lubricant and encourages the gasket to slide. Match the sealant to the fluid and temperature, apply it sparingly, and torque in the correct order. The result is a joint that stays dry long after expensive multi-layer gaskets have failed on sloppy assembly.
First Start After Installation: The Sounds and Smells That Signal Trouble
You turn the key or press the start button, and instead of a clean roar, you get a wheeze, a metallic rattle, or a high-pitched squeal that fades after a few seconds. Don't shrug it off. A brand-new installation should settle into a steady, predictable tone. Any knocking that rises with engine speed, a grinding on cold starts, or a whistle that only appears under load is the machine trying to tell you something was not seated, torqued, or lubricated correctly during the install.
Then there's the smell. A faint whiff of burning oil or hot rubber might be written off as "new parts breaking in," but that excuse dies fast. Sweet, syrupy odors suggest coolant seeping onto a hot surface. Acrid, eye-watering smoke from under the hood means a gasket didn't seal or a wire is resting against an exhaust manifold. Even a heavy fuel smell after the first few minutes points to a loose fitting or a cracked line from the job.
If you catch these signals early, you save yourself from a roadside breakdown or a fire. Pop the hood, look for fresh wetness around flanges and connectors, and feel for hoses that are harder than they should be. Not every odd noise means disaster, but every odd noise after a fresh install deserves a second look before you trust it on the highway.
FAQ
Look for repeated coolant loss without an external leak, white exhaust smoke on startup, milky oil on the dipstick, or a compression test showing two adjacent cylinders low. Visible cracks in the combustion chamber, cam journal scoring, or warpage beyond the factory limit after a straight edge check also mean a replacement head is the safer route.
Match the casting number stamped on your old head, not just the engine family. Confirm the year, displacement, and whether the head has variable valve timing, direct injection notches, or a specific cam sensor mount. Port shape and valve size should be compared side by side with the old unit before you unbox tools.
In most cases, yes. An OEM complete head ships with factory valves, springs, seals, and often the camshafts already installed and lashed. You skip core charges, mixed-brand internals, and the guesswork of whether a reman head was welded or decked past spec. If the engine is stock and you plan to keep the car, the higher upfront cost usually pays for itself in fewer comebacks.
Pull the plastic shipping caps and inspect every oil and coolant passage for metal chips or packing debris. Check for hairline cracks around the valve seats and spark plug threads. If the cam carriers are separate, verify their torque marks are painted and none are loose. Also run a straight edge across the deck surface even on a new head, because shipping damage happens more often than people expect.
Always use new head bolts if the originals are torque-to-yield. Chase the block threads with a bottoming tap and blow them dry. Follow the factory torque pattern from the center outward in three or more stages, then apply the final angle with a degree gauge. Never substitute the old head gasket, and make sure the alignment dowels seat fully before torquing.
At minimum replace the head gasket, head bolts, intake and exhaust manifold gaskets, valve cover gasket, and any timing components you disturbed. If the timing belt or chain is near its service interval, this is the cheapest time to do it. Coolant and engine oil should be changed, and the block deck needs a flatness check before the new head goes on.
Prime the oil system by cranking with the fuel or ignition disabled until the oil pressure light goes out. Start it, let it idle until the cooling fans cycle once, and watch for leaks at the front and rear corners. Retorque or recheck head bolts only if the service manual calls for it. Keep rpm under 4,000 for the first 500 miles, avoid long full-throttle pulls, and change the oil and filter after 500 miles to flush assembly lube and any fine metal from the new cam and followers.
Conclusion
A repeat head gasket failure is rarely a coincidence, and it often points straight back to the casting itself rather than the gasket or the installer. Before you order another "OEM complete" head, pin down exactly what the supplier means by complete: are the valves, springs, seals, and cam already installed, or will you be swapping parts from the old casting? Ask for photos of the actual unit, not a stock image, and check the casting numbers and date stamps against your engine code. Core charges can hide surprises too—some shops reject cores for hairline cracks or erosion that weren't obvious in the listing. Once the head arrives, resist the urge to lift it straight onto the block. Do a dry fit without the gasket first, checking dowel alignment, deck flatness, and bolt hole clearance. That extra twenty minutes catches the mistakes that turn into expensive teardowns later.
Installation is where most people overspend on gaskets and underspend on procedure. A premium MLS gasket won't save you if the torque sequence is off or the sealant is applied in the wrong spots. Follow the manufacturer's sequence exactly, in stages, and use the specified sealant only where the manual calls for it—not as a general coat. After the first start, let the engine idle and listen for ticking that doesn't fade, a sign of lifter or rocker trouble. Sniff for sweet coolant or burnt oil smells, and watch for steam from the exhaust joint or oil seeping at the head-to-block seam. These early cues tell you whether the new head is seating properly or if something was missed in the dry fit. A careful first hour beats a second teardown.
Contact Us
Contact Person: Shelly
Email: [email protected]
Tel/WhatsApp: 8613967667688
Website: https://www.yongyu.com/